|
|
Bearley Station
Bearley station opened on 10th October 1860 and situated on
the GWR line from Hatton to Stratford-on-Avon, about half a mile to the east of
the village of Bearley. The station has undergone several iterations in the
first 150 years of its existence. Originally one of three small rural
intermediate stations (the others being Claverdon and Wilmcote), the opening of
the line to Alcester on 4th September 1876 raised the importance of the station
as it was the eastern terminus of the Alcester branch. It was during the
Edwardian period of Bearley's existence that saw the greatest number of
passengers using the station, details being given below. Bearley's prominence
was further raised when the North Warwickshire Railway opened in 1908, although
this was more associated with staffing levels required to man two signal boxes.
It was during the period when the line was doubled between Bearley and Hatton
that the station reached its most prominence although this was more in terms of
goods traffic than passenger numbers. The downgrading of the route in the post
Beaching era meant the line was singled and the station became an unmanned halt
with a bus shelter on the single platform.
It is set amidst the open farm land and tree-lined
hedgerows that typify this part of Warwickshire with road access being obtained
off the Stratford upon Avon to Henley-in-Arden road, now known as Birmingham
Road. When first opened, the line between the terminus at Birmingham Road,
Stratford upon Avon to a junction at Hatton station, was a mixed-gauge single
line of some 9¼ miles in length. Following a connection made at
Stratford upon Avon with the Oxford, Worcester & Wolverhampton Railway's
line from Honeybourne in 1861, narrow-gauge services were run through to
Honeybourne and Worcester. Stanley C Jenkins and Roger Carpenter write in their
superb book The Alcester Branch, Wild Swan, ISBN-10
1905184050, 'during the 1860s, Bearley station was a quiet country
station with a crossing loop, a signal box, two brick-faced platforms, a
modest-sized goods yard, goods shed, weigh- bridge and office and a station
master's house, all constructed in red brick, with slate roofs. The original
station building may well have been a brick-built structure in keeping with the
adjoining stations at Claverdon and Wilmcote, but this was demolished in 1876
when Bearley became a junction for the Alcester Railway This resulted in
alterations which included the provision of a new station building on the up
side or east-bound platform and a smaller waiting room on the down side. The
new station building was designed by William Clarke, the Alcester Company's
engineer, and was constructed of red brick, with a gabled, date-covered roof in
a style employed on other lines for which he was responsible, including the
Newent Railway, the Ross & Ledbury Railway, the Bristol & North
Somerset Railway, and the Leominster & Kington Railway. Trains to
Alcester departed from Bearley's down platform and diverged north-westwards
from the line to Stratford upon Avon line controlled by Bearley East Junction
signal box.
When the North Warwickshire line was opened in 1908,
part of the existing line between Wilmcote and a point south of Bearley was
incorporated into the route and consequently doubled. The divergence of the new
route involved the creation of a new junction, named Bearley West, to the south
of the station and another two junctions to the west of the station, Bearley
North and Alcester Branch Junction, where the new line joined, then left the
route of the existing Alcester branch. The existing junction at the station for
the Alcester branch was renamed Bearley East Junction; at the same time the
line between the West Junction and the East Junction was doubled, and a new
connection from the down line to the goods siding was put in, as was an
additional siding in the goods yard. The station remained in this form through
to the end of the 1930s when the layout was subject to yet more
upheaval.
In the Edwardian period, Bearley typically issued around
14,000 tickets per annum. In 1903, for example, the station booked 14,551
tickets, whilst in 1913 there were 14,359 passenger bookings. These annual
figures had fallen to around 10,000 bookings a year during the 1920s, although
there were were, by that time, between 130 and 190 season ticket holders making
regular journeys to and from the station. In 1937 Bearley issued 8,534 ordinary
tickets, but there were also 301 season ticket sales, suggesting that the
station had developed a healthy commuter business by the later 1930s. Freight
traffic amounted to about 5,000 tons per annum during the early years of the
20th century and this figure remained more or less constant throughout the
1920s. Thereafter, the amount of freight traffic handled increased
considerably, and in 1938 Bearley dealt with 18,690 tons of freight. By this
time, the development of railway owned road delivery vehicles meant that
certain stations gained extra traffic while others declined as their 'smalls'
traffic was diverted to selected railheads and country lorry centres. The
Railway Clearing House's Handbook of Stations states that in 1894 the station
only handled passenger and general goods traffic with a fixed position
hand-operated one and half tons crane being available within the goods shed. By
1928 the services on offer had increased slightly as the station could now
handle livestock and Horse boxes and Prize Cattle Vans, however the crane
inside the shed was down rated to lifting loads to a maximum of one ton.
Something of this nature had clearly taken place at
Bearley although the station was not itself a country lorry centre. More
importantly there was also an upsurge in roadstone and other mineral traffic
during the later 1930s, and this type of bulk freight traffic amounted to 6,569
tons in 1936, 15,730 tons in 1937 and 14,353 tons in 1938. Domestic coal
traffic was another form of inwards freight traffic, and in most years Bearley
handled about 2,300 tons per annum. The coal was supplied by Warwickshire pits
and distributed by locally-based coal merchants such as Mr Snell, who operated
from Bearley goods yard. At this period, coal came from the pits of Baddesley,
Newdigate and Coventry collieries. Other inwards traffic included animal feed,
fertilizers and variable amounts of general merchandise. Throughout most of the
1930s, Bearley dealt with little more than 300 tons of general goods traffic
per annum, but in 1938 this meagre figure increased to 1,052 tons, possibly
because of the growth of carted 'smalls' traffic that had hitherto been handled
at other stations.
Bearley's staffing establishment rose from seven in 1903
to eleven by 1913, following the opening of the North Warwickshire line and a
consequent need for extra signalmen at Bearley North and Bearley West
junctions. In 1925 the station provided employment for sixteen people including
one Class 5 station master, four porters, eight signalmen, one gatekeeper (at
Edstone Level Crossing), one part-time cleaning woman and one general clerk.
This same basic establishment remained without major alteration for several
years, and by the 1930s, the staff included one Class 5 station master, two
leading porters, two porters, eight signalmen, one general clerk and one
gatekeeper. There were no lorry drivers at Bearley itself, collection and
delivery arrangements in the area being concentrated on the nearby 'country
lorry centre at Stratford-upon-Avon. It appears that local collections and
deliveries were handled by a vehicle from Stratford that was sent out to
Bearley station on a daily basis, the drivers involved being based at Stratford
rather than Bearley.
Bearley's station masters included John Twist, who was
in charge of the station during the 1870s, and William Morewood, who remained
at the station for over twenty years between the early 1880s and about 1905. By
1908, the station master was Charles Overbury but he left in 1909. and was
replaced by Joseph Billington, who came to Bearley after previous service at
Cropredy on the Oxford to Birmingham main line. Mr Billington was still at
Bearley in 1916, though he had gone by the early 1920s, by which time the local
station master was Joseph Tolley In 1938 the GWR embarked on a scheme to widen
the Hatton to Bearley section to take double track. By this time, this route
was becoming heavily used by freight trains bound for South Wales, chiefly iron
ore workings from the Banbury area. It was also used for excursion traffic
during the summer timetables, as well as a diversionary route to the North
Warwickshire line for through passenger and freight workings to the west and
South Wales. Work on the widening commenced in May 1938 and at Bearley station
this entailed the rebuilding of the waiting room on the down platform and the
addition of a footbridge linking the platforms. The new works were brought into
use from 2nd July 1939. Finally, during the early part of the war, two new
sidings were laid in on the down side for the delivery of materials for a
nearby RAF establishment. After the war, these sidings were used to store
wagons awaiting repairs.
We would like to take this opportunity to acknowledge the
source of much of the information used on this and associated pages as being
derived from Stanley C Jenkins and Roger Carpenter's book, 'The Alcester
Branch, Wild Swan, ISBN-10 1905184050'.
The Original 1860 Bearley Station
The rebuilt 1939 Bearley Station
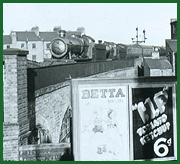
Locomotives and trains seen at or near Bearley Station
Ordnance Survey Maps
Bearley Station and Bearley East Junction
Bearley Station and the branch to Alcester
|