|
|
London North Western
Railway:
Midland
Railway:
Stratford
Midland Junction Railway
|
|
LMS Route: Coventry Loop Line
The Coventry Loop Line was built to divert goods traffic
from Nuneaton away from the congested lines running through Coventry station.
The line first opened, on 16th August 1914, with the new junction commencing
from the Coventry side of Bedlam Crossing on the
Nuneaton to Coventry line. The line ran
from Three Spires Junction to Folley Lane Junction better known as Humber Road
Junction on the Coventry to Rugby line,
the latter junction not being opened until circa 1916.
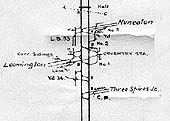
Mileages
| 0.00 |
Humber Road Junction |
| 0.59 |
Gosford Green |
| 2.08 |
Morris sidings |
| 2.47 |
Bell Green |
| 3.44 |
Three Spires Junction |
The goods line served Gosford Green Goods Yard, Coventry
Wholesale Market, Coventry Ordnance Depot, and Bell Green Goods Yard. There
were no scheduled passenger services on the route and it was only very rarely
used for passenger services, primarily diversions during engineering works on
the West Coast Main Line. There were also a number of passenger specials but
these could be counted on one hand. The junction at Humber Road was severed on
7th October 1963 as part of the electrification of the West Coast Main Line.
From this date to closure the line was worked as a long siding to Gosford Green
principally for traffic destined for Chrysler's Scottish Linwood plant.
Included below are various instructions British Railways enforced when the line
was worked as a long siding. The line finally closed in 1981 with the loss of
this traffic and was subsequently lifted. Today much of the line is now the
route of a dual carriageway for vehicles destined for the M6 and Nuneaton.
Martin Kavanagh writes 'Colin Maggs in his book Branch
Lines of Warwickshire quotes a Willesden-Manchester freight as being the
last ever through train to traverse the Loop Line but Geoffrey Hurst in his
book LNWR Branch Lines of West Leicestershire & East Warwickshire
tells an interesting story around Humber Road Junction – Gosford Green
closing on Sunday 7th October 1963, due to be taken out of use on Sunday 13
October 1963, however a Carlisle – Willesden goods derailment blocked the
West Coast Main Line and some traffic was diverted over the Loop Line'.
Signal Cabin Closure Dates
| Location |
Closing Date |
| Gosford Green |
26-02-67 |
| Ordnance Cos Siding |
26-02-67 |
| Bell Green |
26-02-67 |
Working the Coventry Loop Line as a branch line post
1963
Method of working. The down and up goods line between
Three Spires Junction and Gosford Green are under the control of the Signalman
at Three Spires Junction box and Absolute conditions apply. Protection of
trains stopped by accident, etc and Failure of Communications.
Trains stopped by accident, failure, obstruction or other exceptional cause
must be protected in accordance with the provisions of the rule book, Section
M. Should there be no communication between the Signalman at Three Spires
Junction box and Gosford Green, a train must not be allowed to proceed on the
up goods line from Three Spires Junction until the time usually taken by the
preceding train to clear the section plus an allowance for a train having been
stopped and having to run at reduced speed. Should the Guard of a down train
waiting to depart from Gosford Green be unable to contact the Signalman at
Three Spires Junction he may authorise the train to depart after the time
usually taken by the preceding train has elapsed and he has advised the Driver
of the failure and instructed him to travel at caution stopping at Bell Green,
if necessary.
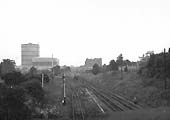
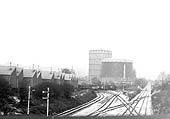
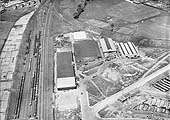
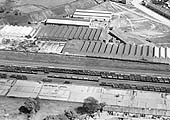
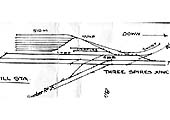
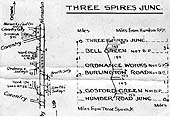
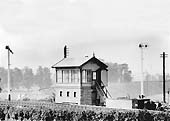
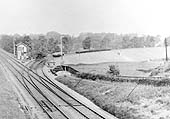
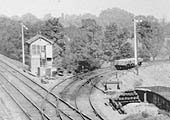
Three Spires Junction
Three Spires Junction was situated on the Coventry to
Nuneaton Line where the Coventry Loop Line branched off to avoid Coventry
Station, rejoining the L & B line further south at Humber Road junction. It
was also the location where sidings were located to handle the coal traffic
originating from the coal fields located between Coventry & Bedworth.
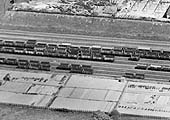
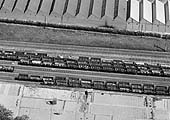
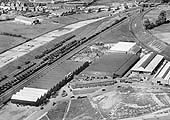
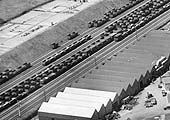
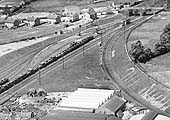
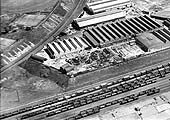
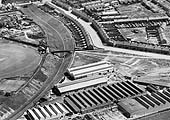
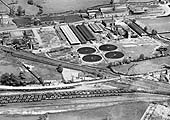
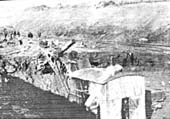
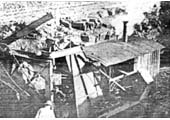
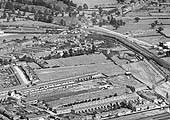
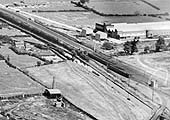
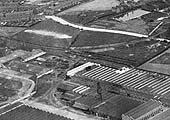
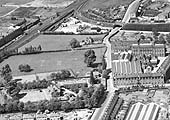
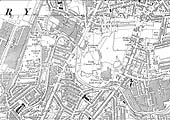
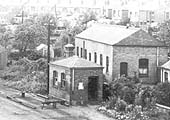
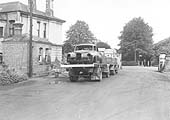
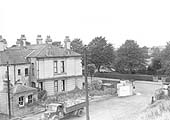
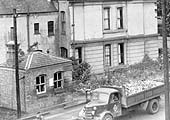
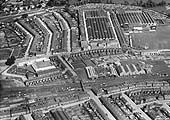
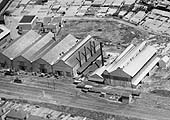
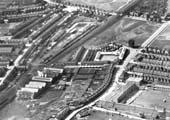
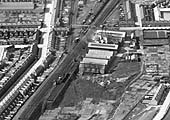
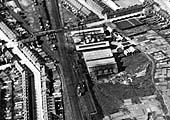
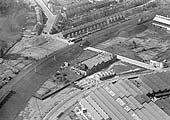
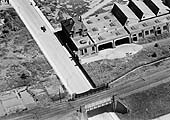
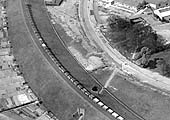
1929 Aerial Views
Miscellaneous
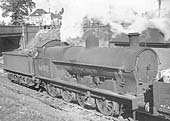
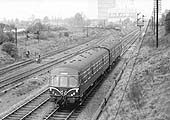
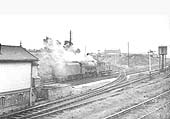
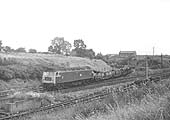
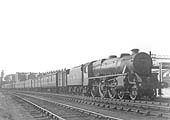
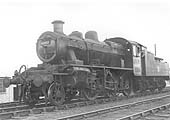
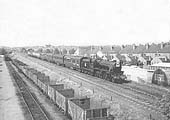
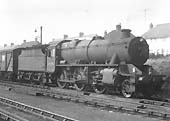
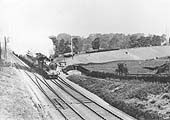
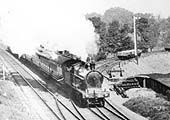
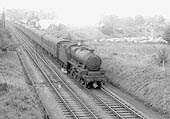
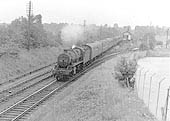
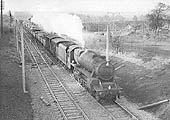
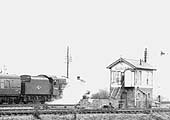
Trains seen at or near Three Spires Junction
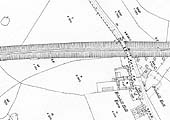
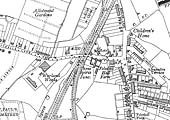
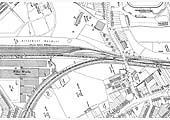
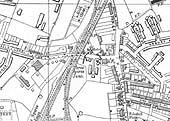
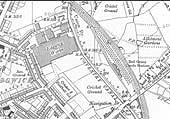
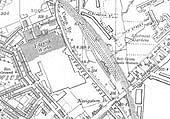
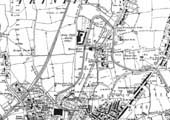
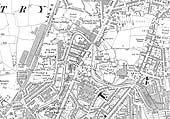
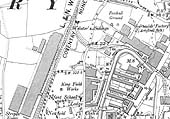
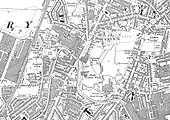
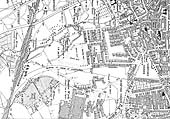
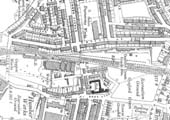
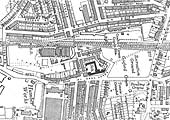
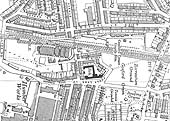
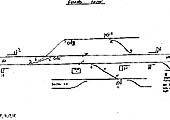
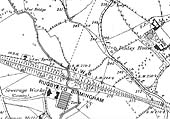
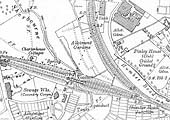
Ordnance Survey Maps, Track Plans and Schematic
Drawings
back to
top
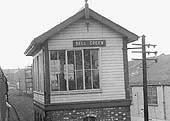
Bell Green
Method of working at Bell Green. Trains must not be
allowed to shunt inside for other trains to pass. The trailing points on the
down goods line are normally clipped and padlocked for through movements along
the down goods line and the key kept in the Three Spires Junction box. The
Guard of a train requiring to call at Bell Green must collect the key from the
Signalman at Three Spires Junction box before departure and sign for its
receipt in the Train Register. When work has been completed at Bell Green the
Guard must set the points for through movements along the down goods line and
clip and relock the padlock. The key must be handed to the Signalman of Three
Spires Junction box upon return and an entry of the fact must be entered in the
Train Register.
Martin Kavanagh writes 'The very last traffic to Bell green
was some Ford car flats carrying Transit vans from Southampton, this would have
been roughly 1982. Although I can’t locate it now I have seen this traffic
listed in a Conditional Working Time Table, I think it was pretty short lived
in nature'.
back to
top
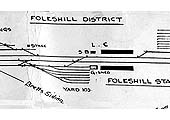
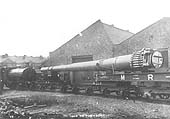
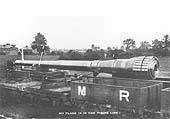
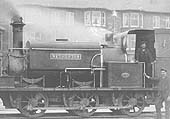
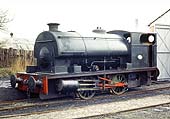
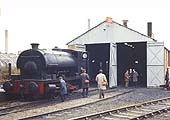
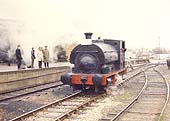
Foleshill Railway
Nominally independent, the Foleshill Railway was opened in
1901 to serve Webster's brickwork's from a junction off the Nuneaton line. In
1905 it was extended to serve the new Courtaulds factory and Coventry Ordnance
Works and in doing so it crossed on the level at Stoney Stanton Road the 3 foot
6 inch gauge Coventry Corporation Tramway system. During the Great War
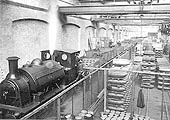
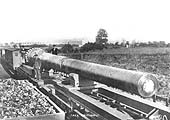
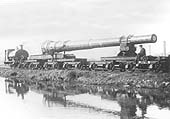
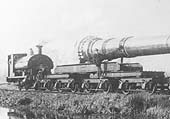
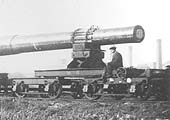
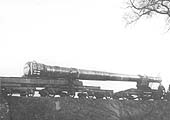
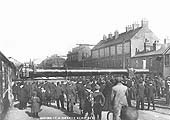
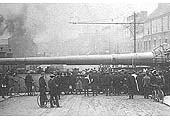
(First World War) of 1914-18 the line carried much heavy ordnance traffic from
the Admiralty works in the form of gun barrels for the Royal Navy's Dreadnought
class battleships. A new connection was made with the Coventry Loop Line in
1914 making it not only a through route but one with access to the Rugby to
Coventry line as well as the Nuneaton to Coventry line. Courtaulds eventually
took over the Foleshill Railway and their traffic was always steam worked, the
line closing on 29th February 1972 after Courtaulds converted their boilers
from coal to gas. A final steaming was staged on 8th April 1972 before some 100
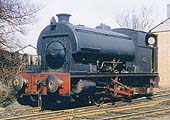
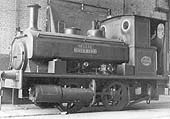
enthusiasts and Courtaulds wove a silk bookmark to commemorate the event.
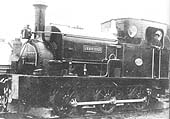
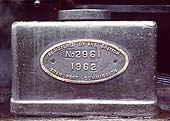
'Rocket', the 0-4-0ST Peckett (Works No 1722 of 1926), which was purchased new
for the line, was handed over to a local RCTS member for transmission to
Tyseley Museum.
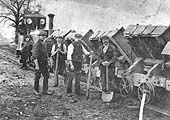
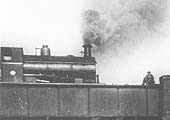
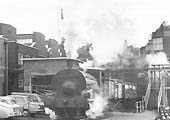
Foleshill Railway - The Great War
Foleshill Railway - The last two decades of steam
Foleshill Railway Open Day - Marking the closure of the
line
Ordnance Survey Maps
back to
top
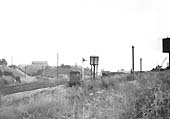
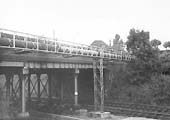
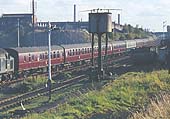
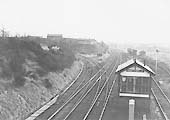
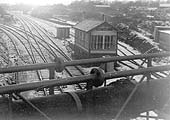
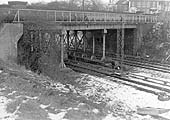
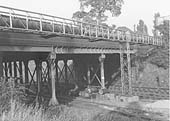
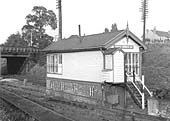
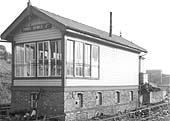
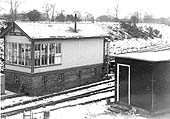
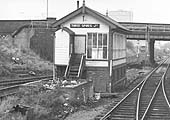
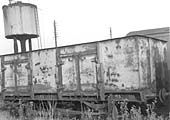
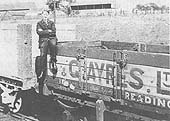
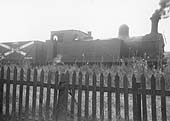
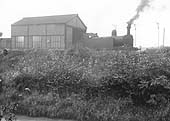
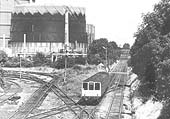
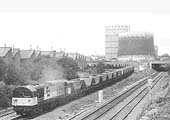
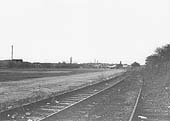
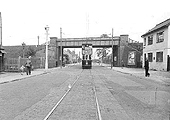
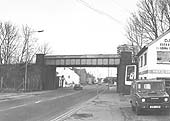
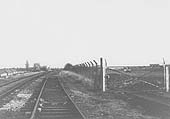
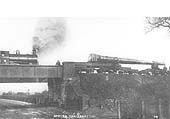
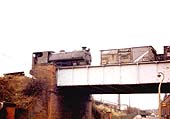
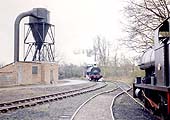
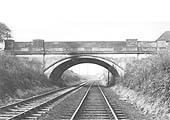
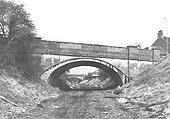
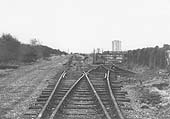
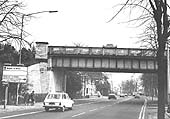
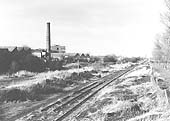
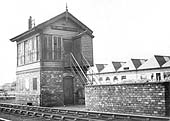
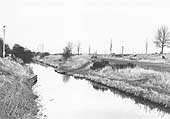
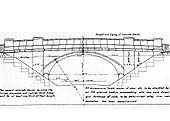
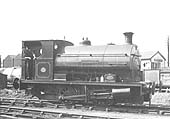
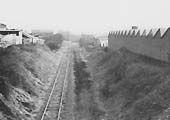
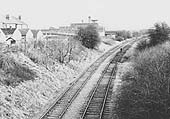
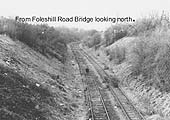
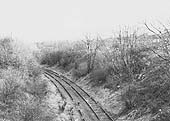
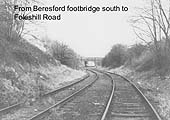
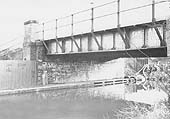
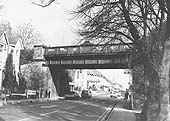
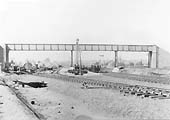
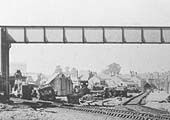
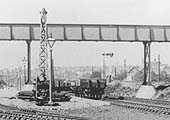
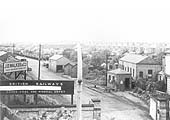
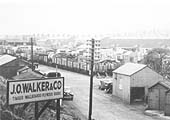
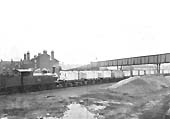
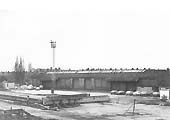
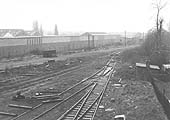
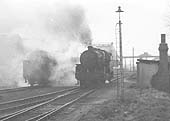
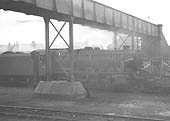
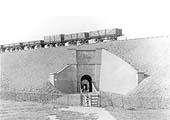
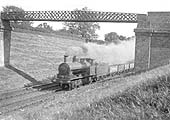
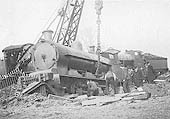
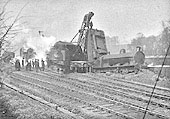
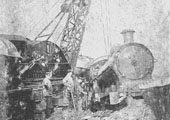
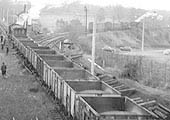
Lineside Views
The following images show the different elements of the
Coventry Loop line ranging from bridges and sidings to locomotives and signal
boxes.
Working at Morris Sidings. Trains must not be allowed
to shunt inside for other trains to pass. The trailing points in the up goods
line are clipped and padlocked for through movements along the down goods line
and the key kept in the Three Spires Junction box. The Guard of a train
requiring to call at these sidings must collect the key from the Signalman at
Three Spires Junction box before departure and sign for its receipt in the
Train Register. When work has been completed at the sidings the Guard must set
the points for through movements along the up goods line and clip and relock
the padlock. The key must be handed to the Signalman of Three Spires Junction
box upon return and an entry of the fact must be entered in the Train
Register.
back to
top
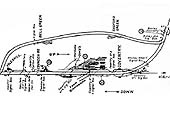
Gosford Green
Gosford Green Goods yard was located off the Binley Road in
the district of Stoke in Coventry. Opened on 10th August 1914 as one of two
goods yards on the Coventry Loop Line its location close to an industrial
district of Coventry meant that it would be in much use for many years. In fact
its closeness to the car factory in Humber Road operated by the Rootes Group,
later the Chrysler Corporation, to move cars between Linwood near Paisley in
Scotland meant that it remained open until the 1970s. The yard had six sidings
arranged in three pairs and handled a wide variety of goods with machined
products outward and materials inward. After approximately six years in service
the facility at Gosford Green was taken out of use when Avenger production at
Ryton ceased on July 1st 1976. Much of the plant was then shipped to Linwood by
rail! With the loss of this traffic the Gosford Green branch was worked on an
'as required' basis twice weekly using a Class 25 stabled at Coventry. This was
the T41 working on Tuesday & Thursday only calling at the Morris Siding and
Gosford Green.
Method of working. A train must not pass the 'Stop'
board situated on the up goods line and enter or leave the sidings until the
Guard has ensured the sidings are clear and that it safe to do so. When the
person in charge of the freight liner terminal is on duty, a movement must not
be made into the terminal until permission of the Person in charge has been
obtained. When the person in charge of the Freight Liner Terminal is not on
duty, the Guard, before authorising the driver to make a movement into the
terminal, must ensure that it is safe to do so. Propelling movements of
Carflat, Bocar, and/or Freightliner vehicles, loaded or empty, must not be made
in either direction through the crossover connecting the yard shunting neck
with the down goods line. Such movements must be made via the up goods line.
Departing trains must be formed on the down goods line and incoming trains
split on the up goods line.
On arrival of an up train at Gosford Green, The Guard must
advise the Signalman at Three Spires Junction box when the train with tail lamp
attached is inside the 'Stop and carry out instructions' board situated
opposite the goods office. Before a down train requiring to leave Gosford Green
is allowed to pass the 'Stop and obtain permission to proceed' board situated
opposite the Freightliner Terminal office, the permission of the Signalman at
Three Spires Junction box must be obtained by means of the telephone in the
Shunter's cabin. All movements working on these lines must be drawn by a
locomotive and carry a tail lamp on the rear vehicle. A brake van must always
be the rear vehicle on Class 7 to 9 trains inclusive.
Richard Brierley writes after pointing out an error
regarding the sidings adjacent to the BOC Depot, 'The British Oxygen Co.
depot was not rail connected as indicated. It was in fact located on the
opposite side of Clyde Road, later part of Terry Road, the main buildings being
the hatched block in that position on the maps. The storage yard extended to
the railway embankment and along towards the Folly Lane pedestrian tunnel but
was about 20 feet below rail level. The private sidings and buildings opposite
the yard belonged to Smiths Stamping Works, as visible on one of the maps and
the signal box diagram.
I attended the nearby Gosford Park School (Folly Lane
School in my father's time there) in the early 1950s. In my final two years
there (1953-5), I would cross the footbridge after school and watch the
afternoon general goods shunt from the bank just inside the pedestrian entrance
to the yard. The shunt covered Roads 1-3 and was usually worked by a Leicester
2F (e.g. 58218, 58290) or a Nuneaton Super D (e.g. 49293, 49415). Roads 2 and 3
were usually loose shunted, the loads being mainly timber for the depot at the
Binley Road end of the yard. Stock for the goods shed was more carefully
handled , resulting in the locomotive having to pass our vantage point. Roads 4
and 5, next to the avoiding line embankment, were the preserve of the Rootes
Group traffic. This usually consisted of rakes of curtain sided covered bogie
wagons. Inward loads were mainly car body shells and Commer lorry cabs from the
Pressed Steel works at Oxford.
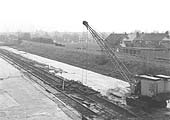
Outbound were often cased up vehicles for export. Smiths
Stamping Works was on the opposite side of the avoiding line and the sidings
were visible from the footbridge. In addition to wagon loads of materials,
there were usually one or two rectangular tank wagons with fuel for the
furnaces. The sidings were also home to a couple of Grafton steam cranes, one
eventually being dismantled and its remains scattered along the embankment
towards Terry Road. After the shunt, the made up train was drawn towards Humber
Road Junction. Here, in a gap in main line traffic, the locomotive ran round
via the crossover on the main line and propelled the train on to the up main
line, then taking the crossover to the down line and onwards towards Coventry.
Fortunately my mother got used to me turning up late after school –
Unthinkable these days!'
back to
top
Humber Road Junction
Opened in 1916 when the Coventry Loop Line was finally
completed, the junction was originally named Pinley Junction after the lane
which crossed the railway at this point. The change of name occurred after the
lane was renamed following the construction of the Humber factory owned by the
Rootes Group. The junction was removed as part of the electrification work to
the West Coast main line although the importance of the Loop Line providing an
alternative route for goods traffic around Coventry had declined with the loss
of traffic to road hauliers. The junction closed on 7th October 1963.
Mr RA Walford writes, 'I hope the following will be of
help. When I was a boy in the 1940s & 1950s I lived near the Coventry Loop
line. In the 1940s I lived near the Bell Green good yard and from my bedroom I
could watch the shunting engines working there. I recall there being various
0-6-0s and 0-8-0s, being used as the main engines. During the war, when
Coventry was being subjected to regular bombings, I remember seeing a train
going regularly along the line with a large anti-aircraft gun mounted on a long
flat wagon. I think it was being used to defend the large factories in the
area, (e.g. Alfred Herbert, Morris Engines, etc). During the above time I
recall that every lunchtime, a small freight train used to leave the Bell Green
yard and head to Gosford Green yard. On route it would stop at the Morris
Engines factory to shunt wagons into the factory and collect wagons from
there.
The Morris factory had a small 0-4-0 diesel to marshal
the wagons around the factory. There would also be a pickup and exchange of
wagons at this stop from sidings on the other side of the main line which were
used by the Royal Ordinance factory. Their factory was about half a mile from
the main line and they had a spur line from the sidings to the factory. There
main motive power was provided by a small 0-4-0 steam tank engine. If I recall
correctly the line went right through the factory, across the Stoney Stanton
Road, via a level crossing, to a large scrap yard at Priestly Bridge. After
this round of shunting the freight train continued onto Gosford Green Yard. I
am sorry if the above is a bit vague but it is now my memory trying to drag
back events from 60 years ago!'
|