HOME  :  LMS  :  GWR  :  LNER  :  MISC  :  ABOUT US  :  SEARCH

Alcester Shed

GWR Route: Alcester to Bearley

Additional pages divided on different thematic subjects are available by clicking on the links below:

Alcester Station - MR Alcester Station - GWR Alcester Shed - GWR (5)

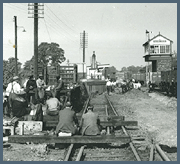
Select an image below to view the larger version with accompanying text:

The Alcester Branch Engine Shed seen from the Alcester Branch
Ref: mra475 - Anon
The Alcester Branch Engine Shed seen from the Alcester Branch
Close up of the Branch Engine Shed and water tower
Ref: mra475a - Anon
xx
The GWR Bearley Branch curving off the MR line to Redditch behind the engine shed
Ref: mra474 - Anon
The GWR Bearley Branch curving off the MR line to Redditch behind the engine shed

A close up of the GWR single road Branch Engine Shed sited at Alcester
Ref: gwr-mra474a - Anon
A close up of the GWR single road Branch Engine Shed sited at Alcester
The derelict GW Branch Engine Shed adjacent to Alcester Junction
Ref: gwr-mra549 - Anon
The derelict GW Branch Engine Shed adjacent to Alcester Junction

View of the junction with the Great Western Railway's branch line to Bearley with the GWR water tower and locomotive shed to its right
Ref: mra1294
Anon
xxx
View of the junction with the Great Western Railway's branch line to Bearley with the GWR water tower and locomotive shed to its right
Ref: mra1295
Anon
xxx

View of the junction with the Great Western Railway's branch line to Bearley with the GWR water tower and locomotive shed to its right
Ref: mra1295a
Anon
xxx
View of the junction with the Great Western Railway's branch line to Bearley with the GWR water tower and locomotive shed to its right
Ref: mra1295b
Anon
xxx
View of the junction with the Great Western Railway's branch line to Bearley with the GWR water tower and locomotive shed to its right
Ref: mra1295c
Anon
xxx
View of the junction with the Great Western Railway's branch line to Bearley with the GWR water tower and locomotive shed to its right
Ref: mra1296
Anon
xxx