|
|
 |
|
|
GWR Route: Alcester to Hatton Junction
GWR Route: North Warwickshire Line
Bearley Junction: gwrbj807
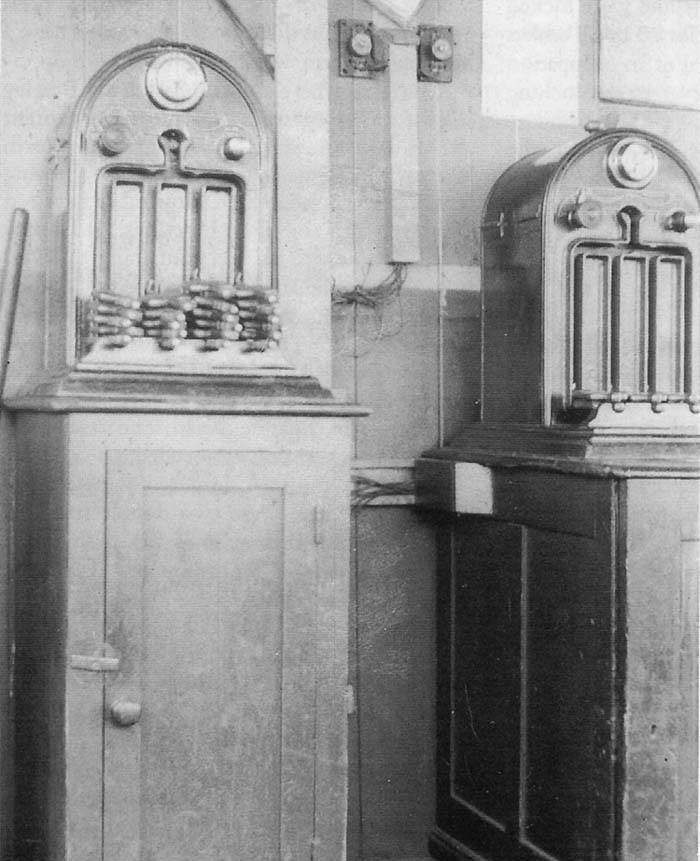
Bearley East Junction Signal Box in 1938 showing the two
single-line Tyers Electric Key-Token instruments. The left hand one is for the
Bearley to Hatton Section (which was a single line until mid 1939) and the
other is for the Bearley North Curve Section. Pressing the main release plunger
at the top right of the instrument would release the lock on the token
instrument at the other end of the section allowing the Signalman to release a
token. The dial at the top of the instrument displayed a needle, which
indicated this.
Tokens were unique to the token instruments at either end
of each single line section, and once a token had been removed, no further
tokens could be removed from either of that section’s instruments until
the original one had been replaced into either of the section’s
instruments. The large number of key tokens in the magazine on the Bearley to
Hatton section instrument were necessary because of the potential for a large
number of unbalanced workings over this route.
Robert Ferris
 back back
|
|
|