|
|
 |
|
|
GWR Route: Alcester to Hatton Junction
GWR Route: North Warwickshire Line
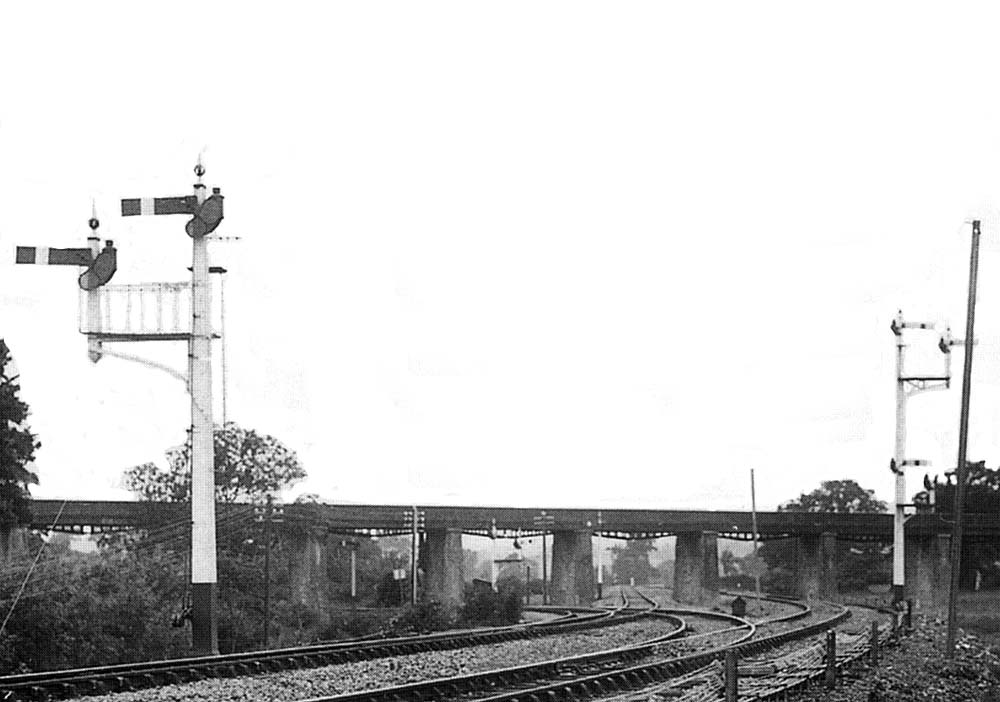
Bearley Junction: gwrbj765a
Bearley North Junction looking to Wooton Wawen at the time
of the construction of the North Warwickshire line circa 1907. The Alcester
branch was realigned for the short section it ran on the new route and can be
seen diverging to the left as it passes under Bearley/Edstone viaduct. The
signal on the right with repeater arms was originally built to be 50' tall in
order for traffic heading towards the camera to the see the signals above the
viaduct. In early BR days in 1952 it was replaced by a tubular 15' high signal.
Although this photograph was taken just five or so years later than that seen
in image 'gwrbj764' the ballast no longer covers the
sleepers being dressed to the top of the sleeper. The raised ballast in the
turnout and a little further on the curve indicates the line was still being
completed when it was in operation. The signals have no 'X' on the arms the
normal practice to denote the signals were not in operation.
Robert Ferris
 back back
|
|
|